 I have become very enamored with how flash can be used to help us improve our images or help us make images otherwise impossible. Through teaching my classes on flash, I have also become especially interested in just how many looks one can achieve simply by using only one flash head. My increased interest in this topic lead me to look for blog posts and YouTube videos on the topic of 1-light shooting. One that really spoke to to what I was after was a B&H Event Space video that featured Robert Harrington. His presentation is entitled "One Speedlight, Multiple Looks" (http://youtu.be/7zZBD6EMB1k). Robert has also put together a book and eBook on this topic on Blurb, if you're interested.

So, Robert Harrington gave me the idea to incorporate this approach into the second of three, 6-hour flash classes I teach. My first class focuses on using an external flash unit on one's camera and the third class has students learn how to work with two to three off-camera light setups. The second class, though, emphasizes how one can get interesting and dramatic shots just by taking that external flash off the camera and positioning it in a variety of ways to get shots you can't usually get with the flash sitting on your camera. In the past, I’ve covered lots of the setups Robert mentions and students left the class with a working understanding of the Inverse Square Law, knowing how to shoot in manual flash, and how to begin to set up a shot. They also knew how to move from the first trial exposures to a light position and camera setup that got them the shot they wanted. However, having an extensive list of one-light setups really provides much better structure to the class or tutoring sessions I do from now on.
I have adapted Harrington’s list by changing a few things and adding some configurations. So far, I am up to twenty-two (22) different one-light setups and the list keeps growing. Not everyone wants to take a class or sign up for 1:1 tutoring sessions and I love to share what I know and help others see the advantage of adding just one light to their photographic toolkit. Therefore, I plan to do a new post on each of my 1-light setups starting in January 2015 and continuing throughout the spring.
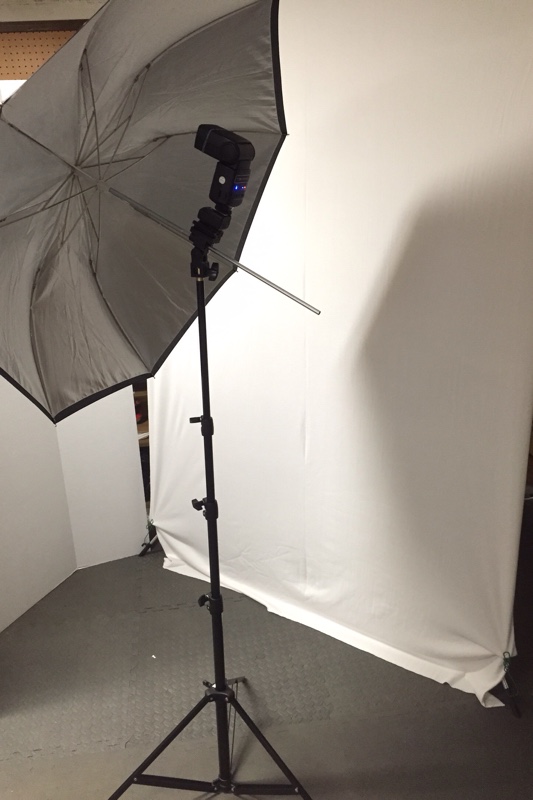
For all of my setups, I will assume that you have at least one light stand, one external speedlight, a means to connect your camera with your speedlight (radio triggers, long cable, or a built-in flash/external flash that will fire the external flash as long as it is in line-of-sight), a reflector or something that can serve as a reflector, and a way to hold the reflector (another stand, DIY stand, chair, or a friend). Instead of a light stand, you could use a tall stool. Some of the setups will describe the use of a shoot-through or reflective umbrella, so if you want to try them, you will also need a convertible photographic umbrella (a white umbrella with a removable black cover).

I am all about economy, so I will not be talking about or using expensive equipment. The flash I will use for all of my setups is a Neewer TT560 unit that is selling on Amazon right now for $36! I use Cowboy Studio radio triggers. The set of one transmitter and one receiver I use (NPT-04) is available on Amazon right now for $20. I use a basic Westcott light stand with flash adapter and a convertible umbrella that can be had for only $72. You may be able to piece together a setup for less, but Cowboy Studio has a stand, adapter, and umbrella kit for only $25! 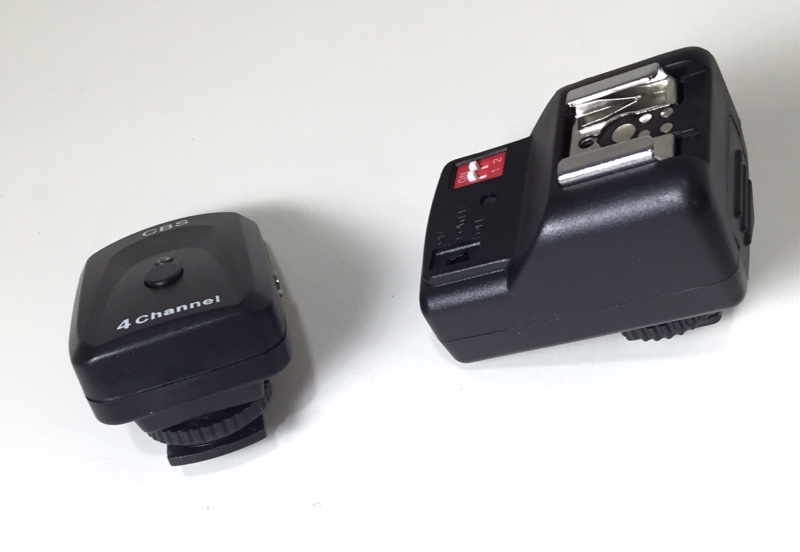 I use 42” Fotodiox 5-in-1 reflector that sells for $23, but you can get similar results with sheets of white foam core board from Michael’s or any craft store for a few dollars. You can fashion a stand for the reflector from PVC pipe if you are so inclined or come up with some way to lean the reflector against things to get the effect we are after in a setup. If you want to purchase the bare essentials, the total comes to $104.
 If you don’t have this equipment or just have some of the pieces, I hope you will follow the posts anyway. Who knows, these posts might just wet your appetite enough to get some of these pieces and give the techniques a try. So, until my first setup post in a few weeks, take a look at the Harrington video and then come back and jump in with my play-by-play setup descriptions!
Because of spammers, I have disabled blog comments, but please leave me questions or comments on my Facebook page (https://www.facebook.com/billbooz) or on Google+ (http://plus.google.com/+BillBooz). I look forward to interacting with you!
In addition to offering scheduled, hands-on photography classes periodically, I am also available to do one-on-one tutoring or small group lessons designed to meet YOUR needs and what you want to learn in the area of photography, using flashes, or the use of Apple products and software. Give yourself the gift of learning: http://www.infotor.com/photoclasses! And check out my tutoring bundle: http://www.infotor.com/photoclasses/tutoringbundle.php as well. I am offering some specials for the holiday season as well: http://www.infotor.com/photoclasses/handouts/HolidayPromo_2014.pdf.