 Probably the worst thing about my first two video recordings was the poor lighting. I was relying on any light coming from an incandescent light in the room and my little ole Lumenator LED light source. Obviously, not enough!! I have now retrieved my trusty old - and cheap! - Home Depot clamp lights with daylight rated fluorescent bulbs in them and given them a go. Better, but I still need to do some work to light my in-house “set.”

Normally, I would do my recording in my basement studio where I can setup a black or white backdrop behind a table at which I would sit. Eventually, this is exactly what I'll do, but for now our basement is a mess awaiting cleanup from some standing water we had as a result of heavy, continuous rain back in October. Therefore, I am forced to use an upstairs room. This, then, introduces the problem of incandescent lights, busy backgrounds, and reflections on windows. Generally, I will do these recordings (until I get the basement cleaned up) at night, so that increases the reflection problem. Unfortunately, the most logical room for me to use is the space my wife and I use as sort of an "office."
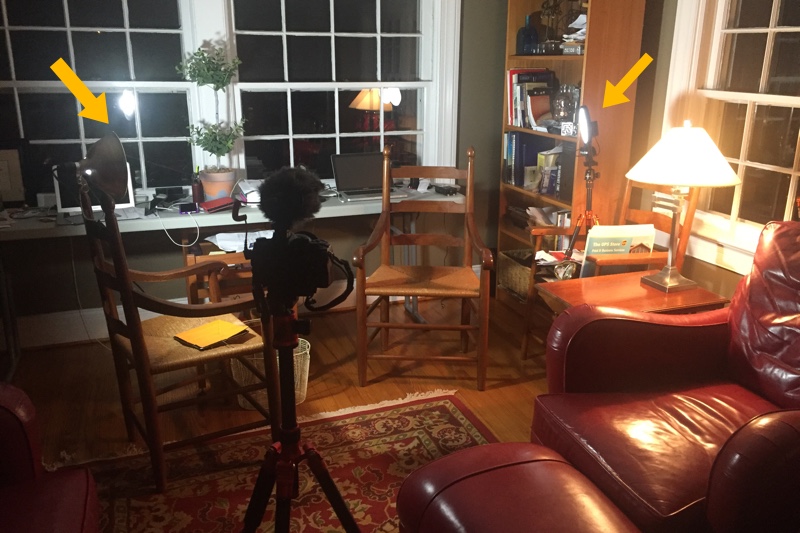
This room is, actually, a former 'sleep porch' and three of its walls are 85% window! (Our house was built in 1927 and since there was no AC and we live in an area that gets hot and humid, people would sleep on their porches to be cool at night.) Naturally, I could put up my flexible Westcott 5' X 7' X-Kit backdrop, but I hate to have to put it up, take it down, etc., every night after using it. Plus, my having to solve the reflection problem may help those who want to do their own in-home video recording and don't have things like the X-Kit.
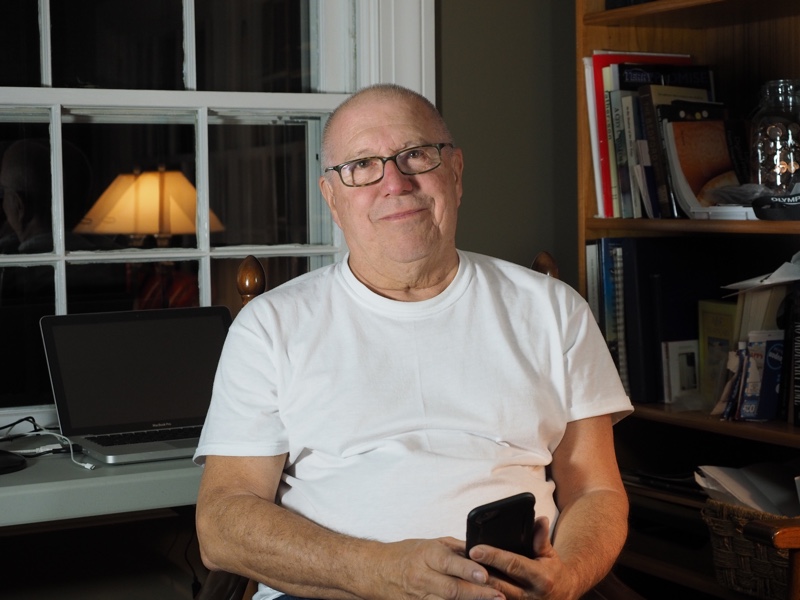
Last night I attached one of my clamp lights to one of our "office" chairs and tested it out to see if it lit me properly. Positioned as I would a key, or main, light in flash photography (camera left at 45°), it lights me up reasonably well. I then put my Lumenator LED off to my left (camera right - see yellow arrows in accompanying photo) and turned its intensity down some. Though somewhat haphazardly positioned on "stuff" sitting on a chair, this seems to provide sufficient light to reduce shadows some. Still need to experiment, but things are looking better. That is, except for the reflections in the windows. That I should be able to address by turning off table lamp and be more careful with positioning of my lights.

If you have suggestions or questions about creating video with your non-video camera (i.e., a dSLR, mirrorless, smartphone, or point & shoot camera), please leave them for me on Facebook or Google+ - addresses are below. And, thank you, for following this experiment!
If you would be interested in virtual tutoring sessions using either Skype or Google Hangouts, please drop me and e-mail or leave a private message to me on Facebook or Google+.
Please follow my learning how to record video with my Olympus OM-D E-M1 on my YouTube Channel!
Please leave me questions or comments on my Facebook page (https://www.facebook.com/billbooz) or on Google+ (http://plus.google.com/+BillBooz). I look forward to interacting with you!
Check out my free eBook on Mastering Your Camera's Priority Modes: http://www.infotor.com/ebooks. Download and enjoy!
I am available to do one-on-one tutoring or small group lessons designed to meet YOUR needs and what you want to learn in the area of photography, using flashes, or the use of Apple products and software. Give yourself the gift of learning: http://www.infotor.com/photoclasses! And check out my tutoring bundle: http://www.infotor.com/photoclasses/tutoringbundle.php as well. A PDF of my brochure is at http://www.infotor.com/photoclasses/brochures/WHBI_2015-16Brochure.pdf.